mounting dream tv mount instructions
Mounting Dream TV mounts are popular for their durability and ease of installation, offering a secure and stylish way to mount TVs of various sizes.
1.1 Overview of Mounting Dream TV Mounts
Mounting Dream TV mounts are designed for durability and ease of installation, offering compatibility with various TV sizes and types. They feature tilt, swivel, and full-motion options, ensuring optimal viewing angles. These mounts support TVs from 42 to 70 inches and are compatible with VESA patterns. Their sturdy construction ensures weight capacity and stability, making them a reliable choice for modern homes.
Proper installation of Mounting Dream TV mounts is crucial for safety and functionality. It ensures the mount supports the TV’s weight securely, preventing damage or injury. Incorrect installation can lead to product failure. Follow the manual’s guidelines to guarantee stability and maintain warranty validity.
Preparation for Installation
1.2 Importance of Proper Installation
Proper installation ensures safety, stability, and optimal performance of your Mounting Dream TV mount. It prevents damage to your TV, mount, and wall. Incorrect installation can lead to product failure. Always follow the manual’s guidelines to guarantee security and maintain warranty validity. Safety warnings and weight limits must be strictly adhered to.
2.1 Downloading the User Manual
Downloading the user manual is essential for a smooth installation. Visit the official Mounting Dream website or product page to find specific models like MD2380, MD2463, and MD2163-K. The manual provides detailed instructions, safety warnings, and compatibility details, ensuring a secure and proper setup for your TV mount.
2.2 Gathering Necessary Tools
Gather all required tools before starting, such as screwdrivers, drills, level tools, and measuring tapes. Ensure you have compatible bolts, washers, and spacers for your TV and wall type. A stud finder is also essential for locating wall studs to securely anchor the mount. Having everything ready ensures a smooth and efficient installation process.
2.3 Assessing Weight Capacity Requirements
Assessing weight capacity is crucial for safety and stability. Ensure the mount supports five times the combined weight of the TV and mount. Reference the user manual for specific load limits and compatibility details. Exceeding the weight capacity can lead to damage or injury, so verify the specifications carefully before proceeding with installation.
Unboxing and Inventory of Hardware
Carefully unbox and inspect all components, including brackets, bolts, spacers, and washers. Ensure all parts are present and undamaged for proper installation.
3.1 Checking All Components
Upon unboxing, verify that all hardware is included, such as wall plates, TV brackets, bolts, spacers, and washers. Ensure no parts are missing or damaged to prevent installation issues later. This step is crucial for a smooth and safe mounting process.
3.2 Understanding Each Part’s Function
Each component serves a specific role: the wall plate attaches to the wall, TV brackets mount to the TV, bolts and washers secure connections, spacers accommodate inset holes, and anchors provide stability. Familiarizing yourself with each part ensures proper assembly and a secure installation. Proper use of each piece is essential for safety and functionality.
Marking the Wall for Installation
Use a level to ensure accuracy and center the wall plate behind the TV. Measure VESA mounting holes to align with the wall studs for stability.
4.1 Using a Level for Accuracy
A level ensures the wall plate is straight and accurately aligned. Place the level on the wall plate, adjust for a straight line, and mark the holes. Double-check the alignment to ensure the TV is straight and properly aligned with wall studs, preventing uneven mounting and ensuring stability.
4.2 Centering the Wall Plate
Measure the wall width and mark the center point to ensure the wall plate is centered. Align the wall plate with the TV’s VESA holes and double-check the position using a level. Proper centering ensures the TV is evenly mounted and visually balanced, enhancing both stability and aesthetic appeal.
Measure the distance between the VESA mounting holes on your TV to ensure compatibility with the wall plate. Use a level to align the holes horizontally and vertically. Check the TV’s manual for VESA pattern details. Accurate measurements ensure proper fit and prevent instability. Double-checking alignment is crucial for a secure installation.
Installing the Wall Plate
4.3 Measuring VESA Mounting Holes
Measure the VESA mounting holes on your TV to ensure compatibility with the wall plate; Use a level to align them horizontally and vertically. Check the TV’s manual for specific VESA patterns. Accurate measurements are crucial for proper installation and stability. Double-checking alignment ensures a secure fit and prevents potential issues during mounting.
5.1 Drilling Pilot Holes
Drill pilot holes into the wall at the marked locations using a level and marker. Ensure the holes are straight and aligned with the wall plate. For concrete or brick walls, use a carbide-tipped drill bit. For wood or drywall, a standard bit works. Check the wall type and weight capacity before drilling to avoid damage.
5.2 Securing the Plate with Anchors
Insert the provided wall anchors into the pilot holes, ensuring they are flush with the wall surface. For drywall, use plastic anchors; for concrete or brick, use metal anchors. Screw the wall plate into the anchors using the provided screws until secure. Tighten firmly to ensure stability without over-tightening, which could damage the anchors or wall.
Attaching Brackets to the TV
Attach the mounting brackets to the TV’s VESA holes, using spacers if necessary for inset holes. Ensure a secure and even connection to prevent instability.
6.1 Aligning with VESA Holes
Properly align the TV brackets with the VESA mounting holes to ensure a secure fit. Check the VESA pattern in your TV’s manual and attach the brackets accordingly.
Use spacers if the TV has inset holes to prevent misalignment and ensure stability. Tighten the screws evenly to avoid damaging the TV or the brackets.
6.2 Using Spacers for Inset Holes
For TVs with inset mounting holes, attach spacers to the bolts before securing the brackets. This ensures proper alignment and prevents the brackets from sitting too deeply in the TV. Use the provided washers and spacers as instructed in the manual. Tighten evenly to maintain balance and avoid over-tightening, which could damage the TV’s mounting points.
6.3 Tightening Brackets Evenly
Tighten the brackets by starting with the outer bolts and alternating to the inner ones. Use an Allen wrench to ensure even pressure. Avoid over-tightening, which could damage the TV’s mounting points. Check alignment periodically and adjust as needed. Once secure, verify the TV’s stability by gently rocking it side to side.
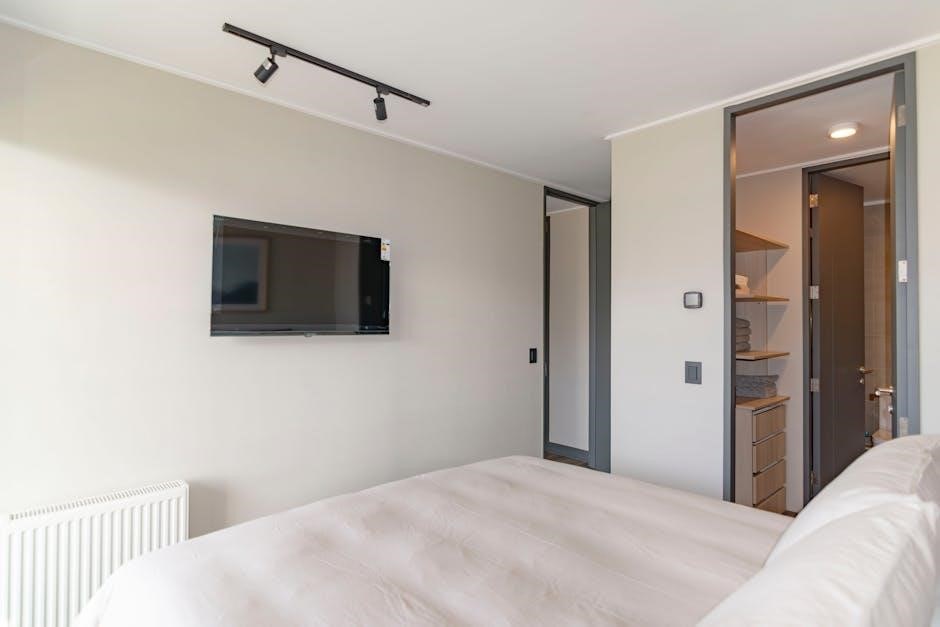
Hanging the TV on the Wall Plate
Carefully lift the TV with assistance, aligning the mounting brackets with the wall plate. Ensure the TV is level before securing it firmly. Check stability.
7.1 Lifting Safely with Assistance
Always lift the TV with at least two people to ensure safety and balance. Use a soft cloth or gloves to grip the TV firmly. Ensure the wall plate is securely attached and level before lifting. Avoid sudden movements to prevent damage or injury. Proper lifting technique is crucial to protect both the TV and installers.
7.2 Adjusting Tilt and Level
After hanging the TV, use a level tool to ensure the screen is perfectly aligned. Adjust the tilt mechanism to achieve the desired viewing angle. Gently move the TV up or down to level it properly. Ensure all bolts are tightened evenly to maintain stability and prevent any wobbling. Double-check the alignment for optimal viewing experience.
7.4 Ensuring Stability
After hanging the TV, ensure all bolts are tightened securely to prevent movement. Double-check the weight capacity and verify the mount supports the TV’s weight. Test stability by gently rocking the TV side to side and adjusting the bolts if necessary. Ensure the mount is firmly attached to the wall plate for long-term durability and safety.
Final Checks and Adjustments
After installation, verify the TV’s security, ensure it is perfectly level, and confirm the mount meets weight capacity requirements. Organize cables neatly for a clean finish.
8.1 Verifying Security and Level
After mounting, ensure the TV is securely fastened and perfectly level. Use a level tool to confirm alignment and tighten all bolts properly. Double-check that the mount holds the TV’s weight evenly and adjust if necessary. Refer to the user manual for specific torque requirements to ensure stability and safety.
8.2 Testing Weight Capacity
Gently apply weight to the TV to ensure the mount remains stable and secure. Check for any wobbling or shifting, which could indicate uneven distribution or insufficient support. Refer to the user manual for the specified weight limit and ensure your TV does not exceed it. This step ensures long-term reliability and safety.
8.3 Organizing Cables
Neatly route and secure cables using cable ties or clips to avoid tangling and damage. Follow the Mounting Dream TV mount manual for cable management options. Proper organization enhances safety, improves aesthetics, and prevents interference with the TV’s operation. Ensure all connections are firm and hidden from view for a clean installation.
Safety Precautions and Weight Limits
Safety precautions and weight limits are crucial for a secure installation. Ensure your wall supports five times the TV and mount’s combined weight, following proper guidelines for a stable setup.
Always read the safety warnings in the manual to prevent accidents. Ensure the wall can support five times the combined weight of the TV and mount. Incorrect installation may cause damage or injury, for which Mounting Dream is not liable. Follow all guidelines carefully to ensure a safe and secure setup. Never exceed the weight capacity specified in the manual, typically up to 100 lbs for most models. Ensure your TV’s weight, including the mount, does not surpass this limit. Exceeding the capacity can lead to instability or damage. Always verify the maximum weight limit in the manual to ensure a safe and secure installation. Address common issues like poor fit or instability by ensuring correct installation and verifying compatibility with your TV’s VESA pattern and weight capacity. Ensure the TV mount aligns with your TV’s VESA pattern and weight capacity. Use spacers for inset holes if necessary. Verify compatibility with your TV size and type. Check the manual for specific model requirements to avoid instability or poor fit during installation. Proper alignment ensures a secure and stable mounting experience. Always refer to the Mounting Dream manual for specific instructions tailored to your model. Check VESA patterns, weight limits, and installation steps. If unsure, consult the troubleshooting section or download the manual from the official website. Ensure compatibility and safety by following the provided guidelines for your particular mount. For further guidance, explore YouTube tutorials and user manuals on the Mounting Dream website. These resources provide step-by-step instructions and visual aids to ensure a smooth installation process. Mounting Dream offers detailed YouTube tutorials for their TV mounts, such as the MD2298 and MD2380 models. These videos provide step-by-step installation guides, making the process easier to follow. They are particularly useful for visual learners, offering hands-on demonstrations. Watching these tutorials can help ensure a smooth and correct installation. Be sure to subscribe to their channel for more helpful content. Mounting Dream provides dedicated customer support to assist with installation queries or troubleshooting. Users can reach out via email, phone, or through the official website. Their support team is available to address concerns, clarify instructions, or provide additional guidance. This resource ensures a smooth experience for all customers. Visit their website for direct contact details. Mounting Dream offers a comprehensive warranty program and reliable customer support. For inquiries or assistance, contact their team through the official website or support email provided in the manual. Mounting Dream provides a comprehensive warranty covering manufacturing defects for a specified period, ensuring customer satisfaction. The warranty typically lasts 5 years, offering protection against defects in materials and workmanship. Proper installation and adherence to instructions are required for warranty validity. Customers are encouraged to register their product for extended support and to review terms for specific coverage details. Mounting Dream offers dedicated customer support for assistance with installation, troubleshooting, or warranty inquiries. Customers can contact the support team via email, phone, or through the official website. Additionally, online resources such as manuals, FAQs, and video tutorials are available to help resolve common issues and provide guidance for optimal product use. Timely and professional help is guaranteed. Regularly clean the mount to ensure stability and safety. Check bolts and connections periodically to maintain security. Proper upkeep prevents issues and ensures optimal performance over time. Regularly clean the mount using a soft cloth and mild soap solution to remove dust and dirt. Avoid harsh chemicals or abrasive materials that could damage the finish. Gently wipe down all surfaces, including the arms and brackets. Ensure the TV area is also clean to prevent dust buildup. This maintains stability and ensures optimal performance. Regularly inspect and tighten all bolts to ensure stability. Use a wrench to check each bolt’s tightness, especially after initial installation. Inspect for signs of wear or damage. Replace any damaged bolts immediately to maintain safety and prevent potential issues. Refer to the user manual for specific torque recommendations and maintenance guidelines.9.1 Adhering to Safety Warnings
9.2 Not Exceeding Weight Capacity
Troubleshooting Common Issues
10.1 Addressing Fit and Compatibility
10.2 Consulting the Manual
Additional Resources
11.1 YouTube Tutorials
11.2 Customer Support Contact
Warranty and Customer Support
12.1 Understanding Warranty Details
12.2 Reaching Out for Assistance
Maintenance Tips
13.1 Cleaning the Mount
13.2 Regular Bolt Checks